By Franklyn Galusha · Franklyns Bay LLC · Crystal River, Florida · June 29, 2026
🔗
Affiliate disclosure: Some links on this page go to Amazon. If you buy something
through one of them, we earn a small commission — at no extra cost to you. It never changes the
price you pay, and it never decides what we recommend. As an Amazon Associate I earn from qualifying purchases.How we make money →
Nobody thinks they need a grab bar. Not one soul, right up until the morning they are lying on a bathroom floor at three in the morning and find they cannot get up off it. The bar that would have stopped it cost forty-five dollars and one Saturday afternoon, back when they were fifty-two and thought the whole business had nothing to do with them. This page is about doing it while it is still your own decision to make.
One bar beside the toilet, one at the shower door, one along the shower wall, and one at the tub — the four places falls actually happen. All stainless steel, rated to 500 pounds, installed with a drill and a screwdriver, about $45 each. Tap any zone below to see the right bar for that spot on Amazon.
ZONE 1 — HIGHEST PRIORITY
🚽 Beside the Toilet
42" bar · Side wall · 33–36" from floor · 6" from front of seat
Do this before you read another word of it. Ten minutes, and you will not need me for any of it.
✅ Your Bathroom Audit — Right Now
Every unchecked box is a bar you need. Every bar you need costs $45–$75 and two hours to install. Do the math.
🚨
The Story Nobody Wants to Be In
It happens the same way nearly every time, which is the one hopeful thing about it.
Illustration. The towel bar came out of the wall. A towel bar is fastened to hold a towel, and that is all anybody ever asked of it — it is the thing most often grabbed at by somebody going down in an American bathroom, and the thing least able to take it.
It is 3:17am. He gets up to use the bathroom the way he has ten thousand times before. The floor is wet. One foot slides. His hand grabs for the towel bar. The towel bar pulls out of the wall. He goes down hard on a tile floor and his hip takes the impact.
And before anybody sells you a bigger answer than you need: a walk-in tub costs thousands and asks you to sit and wait while it fills and drains, because the door is held shut by the water inside it. For most people the step-over problem is solved by a chair and two bars. What the walk-in tub advertisement cannot show you.
He cannot get up. That is the part people never picture, and it is the whole of it. He lies on that tile until six in the morning, when his wife finds him.
Then the ambulance. The emergency room. The surgery. The rehabilitation place. Three months on he is still not home, and he never does live alone again.
The grab bar that would have stopped this cost $45. The surgery cost $34,000. The rehabilitation cost more. His independence cost everything.
The CDC counts these. More than fourteen million older Americans report a fall every year — one in four. Three million of them turn up in an emergency department. A million are admitted to a hospital. And a share of those never go home again, which is the number nobody prints because there is no tidy way to count it.
Falls happen all over a house, and I am not going to tell you they all happen in the bathroom. But the bathroom is the worst room in it. Something on the order of 235,000 older adults a year go to an emergency room over a bathroom injury. Better than eight in ten of those are falls. And better than a third happen in the few seconds of getting into or out of a tub or shower — which is exactly the moment a bar is for.
💡 The Lesson
A $45 grab bar and two hours on a Saturday prevents a $34,000 surgery, three months in rehabilitation, and the end of living independently. The math is not close. The only question is whether you do it at 52 while it is easy or at 72 after it becomes urgent.
14M+
older adults report a fall every year — 1 in 4 — CDC
$50B
annual US medical cost of older-adult falls — CDC
1 in 4
older adults who fracture a hip die within a year — widely reported
💬 What Emergency Rooms See Every Night
These are real patterns from CDC and AARP fall prevention research — not theory. The bathroom fall that puts a senior in the hospital follows the same sequence almost every time.
WHAT THE FALL RESEARCH SHOWS
Bathroom falls among adults 65 and over cluster around night-time trips to the toilet. Low light, balance that has not woken up yet, and a cold or wet floor arrive together — which is why a bar at the toilet is the one most people should put up first.
Fewer than one American home in ten has a grab bar up before anybody falls. The bathroom sends more older adults to an emergency room than any other room in the house. As home modifications go, it is about the cheapest thing on the list and about the most useful.
The towel bar pulled out. That is the sentence, over and over. Somebody grabbed the nearest thing, the nearest thing was never built to hold a grown adult, and it came off the wall in their hand. It is the same story in a thousand different bathrooms.
The universal pattern: something was grabbed, it was not rated for load, it failed. Every correctly installed grab bar eliminates this failure mode entirely.
Think about what that room actually is. A wet floor. Every surface in it hard and most of them sharp-cornered. Two or three movements a day that ask you to stand up out of an awkward crouch, or step over the wall of a tub on one leg with soap on your foot. And all of it laid out in about 1960 by a man who was not thinking about what a body is like at seventy-two, because why would he have been.
⏰
The Window Closes Quietly
Why fifty is the hour for it. Not sixty-five, and certainly not the week after.
At 50 you can still get on a step stool. You can operate a drill. You can read a level and hit a stud and drive a screw. Your hands work the way you expect them to. Your judgment is intact and entirely yours.
At sixty-five most of that is still true. But you find yourself thinking about the step stool for a second before you get on it. You might mention the job to somebody rather than just doing it. Nothing has stopped working. There is only a small hesitation where there did not use to be one.
At seventy-two that hesitation has a name and the knees have an opinion. So you telephone your son, and he says he will come Saturday, and he means it. Then it is three Saturdays and the bars are still in the box in the garage.
Or he does come, and he puts them up wrong, because he has never done it before and does not yet know the one thing that matters about doing it.
There is a window. It opens somewhere around 50 and it closes somewhere around 65 and most people do not notice it closing until it is gone. The bars get installed after the fall, or they get installed by a family member who is now managing your safety instead of visiting you. Neither of those is the outcome you want.
Do it yourself, and do it while doing it yourself is still the easy way. Two hours and about a hundred and fifty dollars of hardware, and then you never give the matter another thought as long as you live in the house.
A drill, a stud, and part of an afternoon. The bar was never the expensive part of this — the willingness to put three holes in a tiled wall is, and that reluctance is the whole reason the suction-cup version sells as well as it does.Fewer than 10%* of American homes have grab bars installed before a fall occurs. Most get installed after the emergency room visit. Some get installed at the rehabilitation facility. By then the choice about where and how many and what kind has been made by someone else, in someone else’s bathroom, for someone else’s budget. Do it yourself now and you control all of it.
* Home-safety and hip-fracture statistics reflect data from the U.S. Centers for Disease Control and Prevention (CDC) and AARP home-safety reporting. We encourage you to check these sources yourself. This is general information, not medical advice — ask your own doctor how it applies to you.
Where a bar goes matters every bit as much as how well it is fastened. A bar in the wrong place is furniture.
Zone 1 — Highest Priority
🚽 Beside the Toilet
Standing up off a toilet seat is the most ordinary thing a person does in a day, and one of the commonest moments to go over. The knees and thighs that made it effortless at forty want a little help by seventy, and they want it two or three times a night in the dark. A bar on the side wall gives you something to push against going up and something to lower yourself with coming down.
Where it goes. On the side wall, thirty-three to thirty-six inches up. That is kitchen-counter height, near enough, if you want something in the house to eyeball it against. Start it six inches forward of the front of the seat and run it back toward the wall behind. Forty-two inches of bar is the number to buy — long enough that your hand finds it whether you are sitting down, halfway up, or all the way standing.
Second bar: A rear wall bar at 33–36 inches gives additional support and is required for ADA compliance in public bathrooms. In a private home it is highly recommended.
The mistake everyone makes: Putting it too far back. A bar you cannot reach from where you are actually sitting is a bar you will not use at the one moment it was bought for. So go and sit down, put your hand out the way you naturally would, and have somebody mark the wall where it lands. That is where the bar goes, whatever the tape measure has to say about it.
Consider what stepping into a shower actually asks of a person. One foot is down on a wet floor. The other is still out on the mat. For about half a second you are balanced on nothing whatever, in the wettest room in the house, generally before you are properly awake. A vertical bar at the opening gives that half second something to hold on to.
Where it goes. Upright, on the wall right beside the opening, and thirty-six to forty-eight inches of it. The test is not the tape measure. Stand where you actually stand to get in, put your hand out, and see where it wants to be — then make sure it is still there when you are coming the other way, because you will be using it in both directions and only one of them is the easy one.
If you put up one bar and no others, put up this one. More falls happen going into and coming out of a shower than at any other spot in the room.
Once you are in there the business is not over. Washing is nothing but shifting weight, bending after a dropped bottle, reaching up, and turning round with your eyes shut against the soap. A long bar down the wall gives you one continuous handhold through the whole performance, so you never have to let go of it and go hunting for it again.
Where it goes. Thirty-three to thirty-six inches up off the shower floor, down the long wall. And buy the thirty-six-inch bar rather than the twenty-four. The extra foot is the whole point — it means you can move the length of that shower without ever letting go and taking hold again, and letting go and taking hold again is where people come unstuck.
Angled bars: A bar angled at 45 degrees serves double duty — useful both as a horizontal grab at standing height and a lower grab when bending. Many aging-in-place specializts prefer angled bars in shower stalls for this reason.
If you have a shower bench: Add a third bar at the front edge of the bench — this is the bar that matters when you stand up from a seated position with wet feet on a wet floor.
Getting in and out of a bathtub is the worst thing this room asks of anybody. You swing one leg over a wall fifteen inches high while standing on the other foot, on a floor that is very likely wet. Then you perform the whole thing backwards on the way out, with a wet foot on a slick tub and nothing at all to hold.
Where it goes. Angled, along the long wall of the tub, starting about six inches above the rim and running up to thirty-three or thirty-six inches. A slanted bar is doing two jobs at once — it catches your hand down low, where you are when you are climbing over the rim, and it is still there up high, where you are once you have made it in and stood up.
Second bar: A vertical bar at the faucet end or entry end gives you an anchor point during the step-over moment — the same logic as the shower entry bar.
Honest note: If getting in and out of that tub is already a struggle, a bar helps and it does not make the problem go away. A walk-in shower with nothing to climb over removes the climb altogether. That is a considerably bigger job and a good deal more money — which is exactly why it is a thing to think about at fifty rather than at seventy-five.
Three ordinary choices that turned out to matter a good deal, and the bar that suited each one.
The Bar He Installed Two Years Before Anyone Needed It
“I put them in the spring I retired, at 64. A vertical bar right at the shower entry to steady myself stepping in, and a long horizontal one down the wall to move along and stand up with. The fellow who did my tile looked at me like I was being dramatic — I wasn’t even having trouble yet. That was the point. Two winters later I had a knee replaced, and for about six weeks that shower was the only place in the house I felt sure of my footing. I didn’t put the bars in because I needed them. I put them in because I didn’t want to need them and not have them.”
— Walt, 66, central Florida
The Toilet With No Wall Beside It
“When my husband came home after his surgery, the hardest thing in the house turned out to be the toilet. It sat out in the open — no wall on either side to bolt a bar to. He is a big man and I am not, and every time he needed up I had to haul him, which frightened us both.
Our handyman mounted a fold-down bar to the wall behind the toilet — the kind that flips up out of the way and has a leg under it. He could push straight down on it and stand on his own, then flip it up when he was done. It gave him back the one thing he hated losing, which was doing that by himself.”
— Ellen, 68, coastal Georgia
The Bar That Let Go
“I bought the kind that sticks on with two little levers — no drilling, and my shower is one of those one-piece fiberglass units. I trusted it. One morning I put my weight on it stepping out and it popped clean off the wall in my hand. I caught myself on the sink, which at 71 I count as lucky. I learned the hard way that the suction ones are for steadying, not for catching a fall. There was no stud where I needed one, so instead of fighting the fiberglass I had a floor-to-ceiling pole set in beside the tub — wedged tight, no holes in the wall. Solid as a handrail. I should have started there.”
— Rosa, 71, Tampa Bay area
These accounts are composite voices, built from the common, real experiences behind these decisions — the names are not those of real individuals, and these are not customer testimonials. Individual results vary.
🧰
Every Kind of Grab Bar — and What Each Is Best For
Match the bar to the movement it has to catch, and to the wall you have actually got.
1. Straight (Standard) Bar — The Workhorse
The plain one, and the one most people ought to buy. Twelve to forty-eight inches of it, and it can go up three ways: horizontal (pull along it, push up to stand), vertical (steady yourself stepping in or up), or diagonal (a little of both).
Best for: the long wall of a shower or tub, and beside a toilet that has a wall next to it. If you buy one bar, buy this. Watch for: it has to hit studs or use anchors rated for grab bars. Textured or knurled finish so a wet hand doesn’t slip.
2. Angled / Diagonal Bar
One bar set on a slant, so your hand travels up and along together instead of stopping at a corner. Your hand is going that way anyway; the bar may as well go with it.
Best for: the sit-to-stand and step-over motions — rising off a shower bench, swinging a leg over a tub wall. The angle gives a moving handhold instead of a fixed one. Watch for: set the slope toward your stronger side, and still anchor into structure.
3. Flip-Up / Fold-Down Bar
Bolts to the wall behind the fixture and folds up flat when nobody wants it. Most have a leg down to the floor. This is the answer to a toilet sitting out in the middle of the room with no wall to bolt anything to — a situation that defeats more people than any other in this business.
Best for: a toilet with open space on one or both sides and no side wall to bolt to. Also good in tight layouts where a fixed bar would be in the way. Watch for: it needs solid backing on the wall it hinges from; check the weight rating before you trust it to stand up with.
4. Floor-to-Ceiling Tension Pole
A pole wedged tight between the floor and the ceiling, with no hole drilled anywhere. Most have a handle that swings round and locks wherever you want it. When there is no stud to be had and the wall is one-piece fiberglass, this is how you get a solid upright to hold.
Best for: spots with no stud to catch — a one-piece fiberglass surround, beside a tub, or next to the bed. Gives a full-height vertical grab where a wall bar can’t go. Watch for: you need a solid, flat ceiling (not slanted or drop), and the tension has to be set and re-checked per the instructions.
5. Suction-Cup Bar — Read This One Carefully
Two little levers and it is on the wall. No tools, no holes, and it is the one nearly everybody reaches for first, which is the trouble with it.
Best for: a light balance cue or a travel steadying aid on smooth, clean, non-porous tile or fiberglass — nothing more. This is NOT a fall bar. It can release without warning, especially on textured, grouted, dirty, or slightly uneven surfaces. Never put your full weight on it, test the seal every single time before you touch it, and never make it your primary support. Anywhere you might actually need to catch yourself, bolt in a real bar.
6. Toilet Safety Frame / Rail
A frame that stands around the toilet on its own legs, or a rail bolted to the toilet itself. Two arms, one either side, to push up on and lower down with.
Best for: renters and anyone who can’t drill, and for two-sided support when there’s no wall on either side. Watch for: it’s an aid for rising, not a wall-anchored bar to arrest a fall — make sure it’s stable and set to the right height.
7. Tub-Clamp (Tub-Mounted) Bar
Clamps onto the wall of the tub, which puts a handle exactly where the leg goes over. That is the right spot and it is the hardest spot to reach with a wall bar.
Best for: getting safely over a high tub wall without drilling. Watch for: it only fits tubs with the right wall thickness — it won’t clamp to a fiberglass surround — and it steadies the step-over, it doesn’t replace a wall bar.
8. Bariatric / Heavy-Duty Bar
The same shapes as any other bar, built heavier and rated higher — often to five hundred pounds.
Best for: anyone who needs a higher capacity, or who simply wants extra margin over the standard rating. Watch for: the higher rating only holds if the anchoring matches it — heavy-duty bar, heavy-duty install.
9. Grab Bar With Built-In Extras
Bars that also hold a towel, a roll of paper, a shelf or a corner caddy. Support that does not announce itself, which for a good many people is the difference between a bar going up and a bar staying in the box.
Best for: making a bathroom safer without it looking clinical — and for winning over someone who refuses a “medical-looking” bar. Watch for: buy one actually rated as a grab bar (250 lb or more), not a decorative towel bar shaped like one. If the box doesn’t state a weight rating, it isn’t a grab bar.
10. Continuous / Wrap-Around Bar
One bar that turns the corner with you, or runs a whole wall without a break in it. Nowhere to let go and take hold again.
Best for: a long shower wall or a corner where you want continuous support the whole time you’re moving, with no gap to re-grip. Watch for: more mounting points means more studs to find and hit — worth planning before you drill.
A bar installed wrong is worse than no bar. Know what you are anchoring into before you drill.
✅ Install It Right — The Three Rules
1. Studs or WingIts
Into wall studs whenever possible. WingIts rated 300 lbs when no stud is available. Never plastic anchors. Never towel bar hardware.
2. Silicone Every Flange
Mold-resistant silicone around every flange before mounting. Every penetration through a shower wall is a water intrusion point. Seal all of them.
3. Load Test Before Use
Full body weight in all directions before anyone relies on it. Any movement means reinstall. No exceptions. Check annually.
The most important thing you will read on this page: A grab bar that pulls out of the wall during a fall puts you on the floor with the weight of a failed grab bar on top of you. The same towel bar that pulls free and caused the fall in the first place. Install correctly or hire someone who will. There is no middle ground on this.
The six steps below are written plain on purpose. There is no wit in them anywhere, and there is not going to be any.
A man reading a drilling instruction wants to know what bit, what speed, how deep, and what happens if he gets it wrong. He does not want me being clever at him while he is holding a live drill against his own bathroom wall. Follow them in order and do not improvise. The only step people skip is the last one, and it is the only step that tells you whether the other five worked.
1
Find Your Studs First — Before You Buy Anything
Stud location determines bar position. Bar position determines what length you buy. Buy the bars after you know where the studs are, not before.
Use a stud finder to locate studs behind tile or drywall. Mark each one with painter’s tape. In most American homes studs are 16 inches on center — but not always. Older homes, remodeled walls, and non-standard framing mean you cannot assume spacing.
For tiled walls: Use the stud finder on any un-tiled section of the same wall and mark a line across to the tile with an erasable crayon. The stud continues behind the tile at the same location.
The ideal bar position is where the ADA placement guidelines and your stud location overlap. If they do not overlap, the stud wins — adjust bar position slightly rather than mounting without a stud.
2
Mark Position and Check Level
Hold the bar at the target height and have someone else check it with a bubble level while you mark the flange hole positions with a pencil or awl. For a horizontal bar, all mounting holes must be perfectly level — a bar that is even slightly off-level will feel wrong and will not be gripped naturally in an emergency.
Measurement reference:
Toilet side bar: 33–36 inches from floor
Shower horizontal bar: 33–36 inches from floor
Shower entry vertical bar: 36–48 inches tall, positioned at entry
Tub angled bar: from 6 inches above rim to 33 inches high
Straight through the tile and into the framing behind it. Tile does not hold a grab bar; the wood behind the tile does — anything fixed to the surface alone is holding nothing on the one morning it is asked to hold everything.
3
Drill the Pilot Holes
For drywall into stud: Standard 3/16-inch wood bit. Drill to the full depth of your screw length. Clean, simple, strongest possible anchor.
For tile into stud: Diamond-tip drill bit only — never a standard masonry bit on tile, it will crack it. Apply masking tape over the drill point to reduce vibration. Drill at low speed with controlled pressure. No hammer drill setting — ever — on tile. Once through the tile, switch to a standard wood bit to finish into the stud.
For fiberglass shower surrounds: Press firmly on the surface before drilling. If it flexes, there is a gap between the surround and the wall behind it. Toggle bolts through fiberglass with a gap behind it are not safe — the fiberglass itself is the only thing holding the bar. Access the wall from behind to add blocking, or hire a CAPS contractor.
Do not use a hammer drill setting on tile or fiberglass. Ever.
4
When There Is No Stud — Hollow Wall Anchors
Studs are not always where you need them. When they are not, you have two correct options and several incorrect ones.
WingIts anchors — the professional standard for hollow-wall grab bar installation. Designed specifically for this application, installed through tile or drywall, rated for grab bar loads. Follow manufacturer instructions exactly. Available at plumbing supply and hardware stores.
Heavy-duty toggle bolts — the spring-loaded wings open behind the wall and distribute load across the interior surface. Must be rated 300 lbs minimum. Use only in walls that are 5/8-inch drywall or thicker.
Never use: Standard plastic drywall anchors (not rated for dynamic loads), standard toggle bolts not rated for grab bar use, any anchor in 1/2-inch drywall without a stud, any anchor through fiberglass with a gap behind it.
One bar, one man, one Saturday. This is the entire job that people pay two hundred dollars to avoid — and the fixture on the wall behind him will still be there when the house changes hands.
5
Apply Silicone and Mount the Bar
Every penetration through a shower or tub wall is a potential water intrusion point. Seal all of them — every time — without exception.
Apply a continuous bead of mold-resistant silicone caulk around each flange before pressing it to the wall. The silicone creates a waterproof gasket that prevents water from traveling behind the wall surface and rotting your framing over time. Use wet-area or tub-and-tile silicone — not standard latex caulk.
Drive stainless steel screws — at least 1 inch into stud. Using non-stainless screws in a wet environment causes galvanic corrosion between the screw and the bar over time. The screw rusts. The bar loosens. Buy stainless.
Do not overtighten. Snug and firm, not stripped.
6
✓ The Load Test — Do This Before You Walk Away
Apply your full body weight to the bar in multiple directions — pull down, pull toward you, push sideways. A properly installed bar will not move at all. Not a millimeter.
Any movement means reinstall. A bar that moves slightly under body weight will move more under the dynamic force of a falling person grabbing it. That is not an acceptable installation.
Check the bar annually. Add the wiggle test to your annual home safety walkthrough. If any movement develops over time, tighten the screws or reinstall before someone relies on it.
The second flange is the one that settles it. A bar anchored at one end is a lever, not a handhold — both ends into solid framing, or what is on the wall is decoration with a weight rating printed on the box.
❌
What Never Works — Know This Before You Shop
Every one of these is for sale. Every one is sold to you as safety. Not one of them is.
I have no quarrel with the people who make these. They are selling what sells, and what sells is the thing that requires no drill, no stud finder and no Saturday.
My quarrel is with what a man believes after he has bought one. A bar that is not a bar is worse than no bar at all, because a bare wall never once fooled anybody into leaning on it.
❌ Standard Plastic Drywall Anchors
Standard plastic expanding anchors — the kind that come in a box of 50 at any hardware store — are not rated for dynamic load. They are designed for picture frames and shelf brackets. A person falling and grabbing a bar applies a sudden shock load that exceeds what plastic anchors can hold, even if the anchor is rated for the static weight.
If someone installed your grab bars with standard plastic anchors, test them now with the load test described above. If there is any movement, reinstall with proper anchors before anyone relies on them.
❌ Towel Bars Used as Grab Bars
A towel bar is mounted with two small screws into the surface material only — not into studs, not with anchors rated for load. It is designed to hold the weight of a wet towel, approximately 2 pounds. A person grabbing it during a fall applies 200–400 pounds of dynamic force in the fraction of a second it takes the screws to pull through the drywall.
This is not a theoretical risk. The story at the top of this page — the towel bar that pulled out of the wall — is the story that puts people on the bathroom floor. It happens constantly. Every emergency room that treats bathroom falls has seen it.
A towel bar is not a grab bar. Not even close. Do not use one as a substitute and do not allow one to be used as a substitute by anyone in your household.
❌ Suction Cup Grab Bars
Suction cup bars exist in every big box home store. They look like grab bars. They are not grab bars. Suction fails unpredictably on textured tile — exactly the surface in most showers. It fails when the surface is wet — exactly when you need the bar. It fails under the dynamic load of a falling person — the exact moment the bar is supposed to work.
The AARP, the CDC, and most occupational therapists have said the same thing: suction cup bars are not safe for fall prevention. They are appropriate for travel or as a temporary aid. They are not appropriate as the safety device you rely on to not land on a tile floor.
If suction bars are what is currently in your bathroom, remove them and install real bars. The false confidence of a suction bar may be more dangerous than nothing at all.
❌ Decorative Grab Bars Not Rated for Safety Loads
Some bars are marketed and sold as grab bars but are designed primarily as decorative accessories. They look like grab bars. They have the right diameter. They do not have a weight rating that meets the 250-pound ADA minimum for safety use.
Before purchasing any bar, verify the weight rating. It must be clearly stated and must be 250 pounds minimum — 500 pounds preferred. If the weight rating is not listed on the product page or the packaging, do not buy that bar for safety use.
🛍️
What to Buy — Brands Worth Trusting
Three makers own most of this trade, and each is good at something the other two are not.
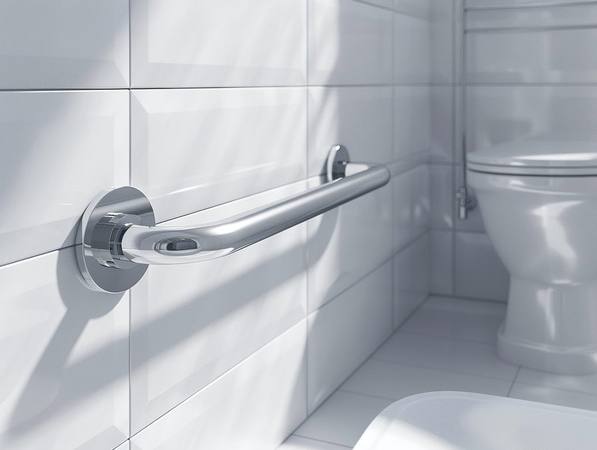
Beside the toilet rather than in the shower — the placement people fit last and use most. An inch and a quarter to an inch and a half through, and an inch and a half of daylight behind it: thick enough to grip hard, and far enough off the wall that an arm cannot wedge in behind it.
The spec that matters most: ADA-compliant diameter is 1.25 to 1.5 inches. The bar must have at least 1.5 inches of clearance between the bar surface and the wall — this prevents a user’s arm from getting trapped. Weight rating 250 lbs minimum, 500 lbs preferred. Peened or textured finish in wet areas — chrome is slippery when wet. Stainless steel construction for wet environments. All of the brands below meet these standards. The differences are in installation ease, aesthetics, and price.
Moen Home Care — Best for DIY Installation
This is the one to buy if you are doing the work yourself, and the reason is a small mercy called SecureMount. Studs are never quite where you want them. Never once, in any house, has a stud been exactly where the tape measure said the bar ought to go. SecureMount gives you a little room to argue with the framing without giving up any strength for it, which is why the aging-in-place people specify it for homeowners more than anything else.
The peened finish on the Home Care line provides genuine grip when wet — important in shower and tub applications. Weight rating is 500 lbs. Available in 12, 16, 18, 24, 30, 32, and 36-inch lengths. Chrome and brushed nickel finishes.
Best for: Homeowners doing their own installation. The SecureMount system reduces the margin for error more than any other residential bar system.
Delta ADA Series — Best for Non-Institutional Look
The commonest objection to a grab bar is not the price and it is not the drilling. It is that a man does not want his own bathroom to look like a hospital room. That objection is not vanity and it should not be argued with — it should be answered. Delta's ADA line answers it: hardware hidden, plain modern lines, finishes that match the taps. It looks like something somebody chose, rather than something a nurse ordered.
The engineering behind the aesthetics is solid. Delta’s mounting plate system provides a robust anchor. Weight ratings meet or exceed ADA requirements. Available in brushed nickel, matte black, chrome, and stainless finishes that coordinate with existing Delta plumbing fixtures.
Best for: Homeowners who want a bar that blends with a renovated or designed bathroom. Also the right choice if the bars are going in a guest bathroom that should not look clinical.
If your bathroom is already Kohler, their bars match it exactly — same finishes, same names, same look — and they will appear to have been there since the house was built. The metal is good. You will pay forty to sixty per cent more than Delta or Moen for a bar that holds a man precisely as well, and whether that is worth it depends entirely on how much it bothers you when two things nearly match.
The Kohler Memoirs and Purist grab bar series are the most commonly specified in high-end aging-in-place renovations where aesthetics are a primary concern alongside safety.
Best for: High-end bathrooms where fixture coordination matters and price is not the primary decision factor.
WingIts are not a bar at all. They are what you use when the wall has let you down. When there is no stud where the bar has to go — and there very often is not — these spread the load across a wide patch of wall behind the surface instead of hanging everything on one small toggle. Professionals reach for them as a matter of course. Follow the instructions to the letter; this is not a part to improvise with.
WingIts are available at plumbing supply stores and online. Installation requires following the manufacturer instructions precisely — the hole size and installation sequence matter. Done correctly, a WingIts installation is a legitimate, safe anchor point. Done carelessly, it is not.
Use when: No stud is available at the required bar location and you cannot access the wall from behind to add blocking.
Learn these before you spend a dollar. Each one is the difference between a grab bar and a towel rail.
Now I am going to be dull for a page, and I would take it kindly if you let me.
What follows is five numbers. They are not interesting and I cannot make them interesting without lying to you about something, and this is the one part of this whole business where a charming sentence could put a man on the floor with a bar in his hand. So here they are, flat, in the order they matter.
Read them once. Take the page to the store on your telephone if you like. Then we can go back to talking like people.
Diameter: 1.25” to 1.5” — ADA Required
The bar must be grippable by a full range of hand sizes. Too thin and it does not give a secure grip under load. Too thick and fingers cannot wrap around it. The ADA range of 1.25 to 1.5 inches exists because this is what occupational therapy research identified as the functional grip range for adults across the ability spectrum.
Bars outside this range — either thinner decorative towel-bar-style bars or thicker commercial bars — are not appropriate for residential safety use. Check the diameter before you buy.
Wall Clearance: Exactly 1.5”
The space between the bar and the wall must be exactly 1.5 inches. More than that and the bar becomes a trap — a wrist or forearm can slide through and become stuck during a fall. Less than that and a full grip is not possible. Most quality grab bars are designed to achieve this clearance automatically with proper installation. Verify before mounting.
Weight Rating: 250 lbs Minimum, 500 lbs Preferred
The ADA requires that a 250-pound force applied at any point, in any direction, be carried without exceeding allowable stresses — and it applies that requirement to the bar, the fastener, the mounting device and the supporting structure. Not to the bar alone.
Measured forces in real use are lower than that. Roughly 23% of body weight during an ordinary tub transfer; in laboratory balance-recovery testing, peak handrail forces averaging around half of body weight and reaching about three-quarters. Figures of two to three times body weight are widely repeated and are not supported by the measurement data.
Buy 500 pounds regardless. The margin costs a few dollars, the test subjects in that research were young and harnessed and expecting it, and a rating is only ever as good as the weakest link in the chain — which is the wall, not the bar.
Length by Zone
Toilet side bar: 42 inches preferred, 36 inches minimum
Tub angled bar: 24–36 inches depending on tub size
Longer bars are generally better — they provide continuous support through a wider range of movement without requiring the user to reposition their grip. Buy longer rather than shorter whenever the wall allows it.
Finish: Peened or Textured for Wet Areas
Polished chrome is slippery when wet. This is not a small issue — a wet hand on a polished chrome bar in a shower or tub has significantly less grip than a dry hand. In the exact moment you most need the bar, the finish works against you.
Peened finish (small dimpled texture) and satin or brushed finishes provide meaningfully better grip when wet. Both Moen Home Care and Delta ADA series are available in peened stainless, which is the optimal choice for shower and tub locations. For toilet bars in a drier location, polished chrome is acceptable.
🚿
The Safe Shower Trio — Bar, Bench, Handheld
A grab bar is one-third of a safe shower. Here are the other two — and why the $40 showerhead might matter as much as the bar.
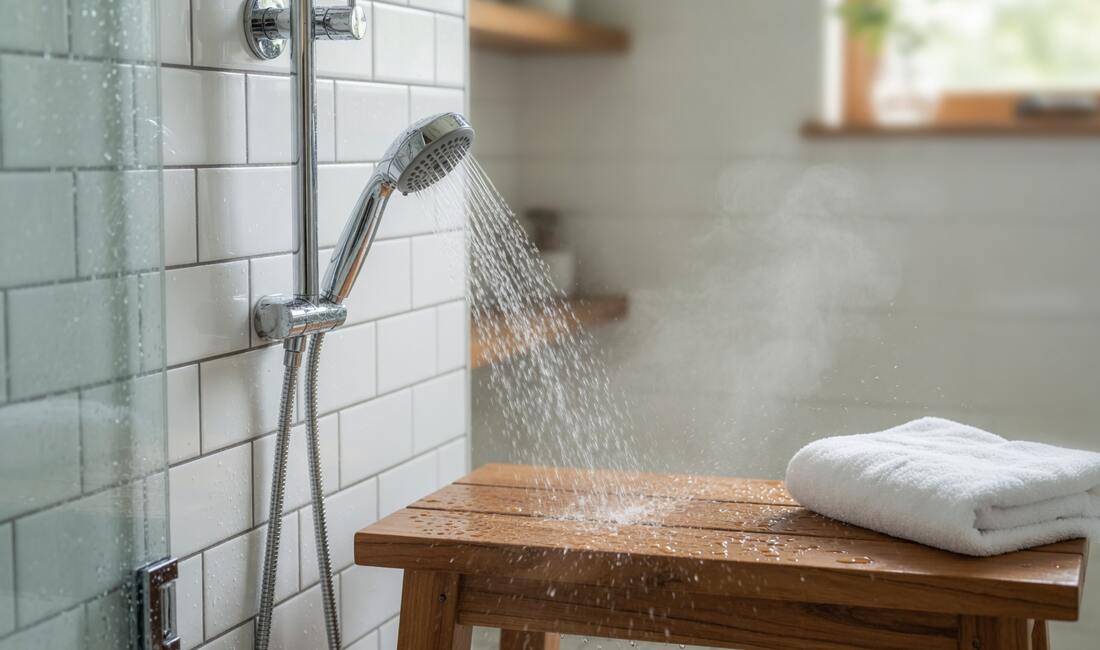
Think about what a fixed head actually asks of you — eyes shut against the soap, one foot up, turning your whole body under the water on wet porcelain. The handheld reverses the arrangement: the water moves and you do not, and it is the cheapest item on this page.
Think about what a fixed showerhead actually demands: standing on wet porcelain, eyes closed against the soap, turning your whole body under the spray, balancing on one foot to rinse the other. That is the fall scenario, performed daily. A handheld showerhead reverses the arrangement — the water comes to you. Seated on a bench with the sprayer in your hand, every part of the routine happens with your weight planted and your eyes open. It is the standard recommendation after hip and knee surgery for exactly that reason, and for anyone who ever helps a spouse or parent bathe, it is the difference between a dignified routine and a wrestling match.
The buying details nobody mentions: the hose length is the spec that matters. The 60-inch hose that comes standard is too short for comfortable seated use — look for 72 to 84 inches. A slide bar mount gives you both worlds: parked up high it works as a normal fixed shower for whoever prefers standing, and it drops to seated height in one motion. And a pause button on the handle keeps the warm water ready while soaping up seated, without the spray running on you the whole time.
The install is genuinely a 15-minute job: unscrew the old showerhead by hand, wrap the shower arm threads with $2 plumber’s tape, screw on the new mount. No plumber, no special tools, and it reverses just as easily — which makes it completely renter-friendly and the single easiest upgrade on this entire page.
Photographed from sitting height, which is the only honest way to look at one. Teak is the version nobody has to feel old about — it sheds water, it holds a grown adult, and it turns the four riskiest minutes of the day into a seated job.
The seat completes the trio. A teak shower bench is the version nobody has to feel old about — it looks like a spa, sheds water naturally, and holds a seated adult securely. For anyone with more significant balance or transfer concerns, a transfer bench straddles the tub wall so you sit down outside the tub and slide in — no stepping over the wall at all. Bar on the wall, bench under you, sprayer in your hand: that is a shower where the water does the moving and you do not.
Most of these you can do yourself. A few you should not. The whole trick is knowing which one is in front of you.
Do it yourself if: You can locate studs and operate a drill, the bars go into drywall or tile with accessible studs or clear space for proper anchors, and the wall behind your shower surround is solid (not fiberglass with a gap behind it).
Hire a pro if: You have fiberglass surrounds with uncertain backing, you want to add blocking behind an existing wall (requires opening the wall), your tile is old and fragile, you are not confident in your stud location, or you want a CAPS-certified professional to assess the full bathroom and specify the complete installation.
CAPS stands for Certified Aging in Place Specializt — a designation from the National Association of Home Builders. A CAPS contractor has specific training in accessibility modifications and knows what a professional aging-in-place installation requires. Professional installation runs $150–$400 per bar, typically completed in under an hour per location.
Your local Area Agency on Aging coordinates low-cost or free installation programs for qualifying seniors in most counties. If cost is a concern, contact them before hiring a contractor. Many programs cover materials and labor for income-qualified homeowners.
💬
What People Say After They Install Them
What people say afterward, which is almost never what they expected to be saying.
“My mother fell in her bathroom on a Tuesday morning in February. She was 74 and she lay on the floor for three hours before my sister happened to call and knew something was wrong. She recovered, but the hip was never right again after that. Three months later I drove to her house and spent a Saturday installing grab bars in both bathrooms and next to her toilet. She said she did not need them. I told her I needed her to have them. She has not fallen since. That was four years ago. I think about that Tuesday morning in February every time I see those bars.”
— Gary, 61, suburban Atlanta
“I installed them at 58 and my husband thought I was being dramatic. I told him I was being practical. I had watched my father go through a hip replacement after a bathroom fall and I knew what that looked like — the surgery, the rehab, the loss of independence for months, the way he was never quite the same after. The bars cost me two hundred and forty dollars and a Sunday afternoon with a drill. My husband used one of them last winter after knee surgery. He has not mentioned dramatic since.”
— Judith, 64, northern Ohio
“I am a home health aide. I have worked with older adults for nineteen years. The number of people I have seen whose entire situation changed because of one bathroom fall is too large for me to count. A hip fracture in someone over 70 is not like breaking your arm. The statistics on what happens in the year after a hip fracture in an elderly person are genuinely frightening.
Grab bars are a fifteen-minute installation that prevents the thing that ends independence. I install them for every client I work with if they will let me, and I tell their families that if cost is the barrier, call your Area Agency on Aging today because most counties have programs that cover this for free.”
— Anita, 52, home health aide, central Florida
“My 79-year-old neighbor lives alone. I helped her install grab bars in her bathroom last spring. Six months later she slipped getting out of the shower — she told me about it afterward, casually, as if it had been nothing. She grabbed the bar. She did not fall. She made herself a cup of coffee and went about her day. She said she wanted me to know because I was the one who had put it in. I was quiet for a moment because I was thinking about what would have happened if I had not done that. She did not fall. That is the whole story. She did not fall.”
— Robert, 67, western Pennsylvania
📋 From the record — the stories here are composites; the falls are not. The CDC’s own numbers: more than one in four adults 65 and older falls every year — over 14 million people — yet fewer than half ever tell their doctor, and falling once doubles the chance of falling again. The yearly toll: about 3 million emergency room visits, 1 million hospitalizations, and nearly 319,000 hip-fracture hospitalizations, with falls also the most common cause of traumatic brain injury. And the geography is exactly what this page assumes: national ED data puts the bedroom, bathroom, and stairs as the most common in-home fall locations — and research on high-risk older adults found a bathroom fall more than twice as likely to cause injury as a fall in the living room: hard surfaces, no soft landings, nothing safe to grab — unless you have put it there. That is the entire case for this page, made by the record.
❓
Frequently Asked Questions
The six that come in most often, answered in the first line so a man in a hurry can read one sentence and get on with his day.
Do grab bars have to go into wall studs?
Into a stud is best, and a stud is not the only right answer. Where a stud lands where you want the bar, screw into it and be glad.
Where it does not — and in a bathroom it very often does not — the answer is a hollow-wall anchor built for this job. WingIts, or heavy-duty toggle bolts rated for 300 pounds or better. Used properly, those are a legitimate installation and not a compromise.
What is never the answer is the little plastic sleeve that came in the bag with a towel rack. That fastener was designed to hold up a towel. It will hold up a towel.
What weight rating does a grab bar need?
250 pounds is the ADA minimum. Buy 500.
You will read in a good many places that catching a fall puts two or three times your body weight onto the bar. I can find nothing that supports it, and I am not going to repeat it.
What has actually been measured is a good deal smaller. An ordinary step in and out of a tub puts roughly 23 per cent of body weight on the bar. In laboratory work where people were tipped over on purpose and grabbed for a rail, the peak forces averaged around half of body weight and topped out near three-quarters.
So why buy the 500-pound bar? Two reasons. The people in those studies were young, they were in harnesses, and they knew a fall was coming, which is three things that will not be true in your bathroom. And the ADA number was never really about the bar in the first place.
Read the rule and you find it requires 250 pounds to be carried at any point and in any direction — so one end of the bar has to take the whole load by itself, not share it politely with the other mount — and it puts that requirement on the bar, the fastener, the mounting device and the supporting structure. The whole chain, not the one link with a number stamped on it.
Which is the useful thing to know, and it is not what the box is selling. The bar is almost never the part that fails. You are buying the 500-pound bar for the margin and for the peace of mind rather than for the engineering, because the thing that decides whether you go to the floor is not stamped anywhere on the box. It is behind the drywall, where nothing is printed at all.
What height should grab bars be installed at?
Thirty-three to thirty-six inches from the floor, and beside the toilet the bar starts six inches forward of the front of the seat.
Thirty-three to thirty-six inches is about kitchen-counter height, near enough, if you want something in your own house to eyeball it against before you go buying a tape measure.
In a private home you are allowed to do better than the code, and the way to do better is to use the body that will actually be using it. Stand where you really stand to get in. Put your hand out the way it goes when you are steadying yourself. See where it wants to be, and put the bar there, so long as you finish inside that range.
Will installing grab bars crack my tile?
Not if you go slowly with the right bit. Use a diamond-tip bit, put a square of masking tape over the spot to keep the bit from wandering, run the drill at low speed, and let the bit do the work instead of leaning on it. Do not use the hammer setting on tile. Ever.
Tile has a worse reputation than it has earned. People drill it every day of the week without incident. What breaks tile is the wrong bit, a fast drill, or a man in a hurry — and of those three, the hurry is the one that causes the other two.
Are suction cup grab bars safe?
No. A suction cup bar is not a grab bar and should not be trusted as one. They release without warning on textured tile and on wet tile, which are the two surfaces they are sold to be used on. AARP and most occupational therapists advise against relying on them for fall prevention.
And there is a particular meanness in the way they fail. A thing that fails every time gets thrown out. A thing that fails once in a hundred times gets trusted — and it gets trusted by somebody who is already halfway to the floor.
If there are suction bars in your bathroom now, take them down and put real ones up.
Will grab bars make my bathroom look like a hospital?
Not unless you buy the ones that are trying to. Delta’s ADA series, Moen’s designer lines and Kohler’s Memoirs series all make bars that read as fixtures — matched finishes, concealed mounting hardware, the same brushed nickel as the faucet.
The institutional look belongs to the cheap stainless bar out of the medical supply catalogue. It looks like a ward because it was drawn for a ward.
A bar that matches the faucet stops being a thing anybody notices. And a thing nobody notices is a thing nobody argues about putting up.
🎁
Buying This for an Aging Parent — How to Make It Happen
More often than not it is a son or a daughter putting these up. Here is how to manage it without starting a quarrel.
If you are reading this on account of a parent rather than yourself, you are doing the right thing, and you had better expect to be argued with.
Most people in their seventies will not ask for a grab bar. A good many will tell you flatly that they do not need one, in a tone meant to end the conversation there.
He is not being stubborn about the bar. He is being stubborn about what he believes the bar says about him. Those are two different arguments, and if you take up the wrong one you will lose it.
So do not call it a medical device, and do not call it a precaution. Call it a home upgrade, because that is what a modern Delta or Moen bar honestly looks like on a wall. It is something you are doing for the house. It is not something you are doing to him.
The approach that works best is not to ask at all. Turn up on a Saturday with the bars, a drill, a stud finder and a level. Put them in. Say you wanted to be sure it was done right. Most parents who would have fought the idea in advance are quietly grateful once the thing is on the wall and nobody made a ceremony of it.
If you are not confident about the installation, hire a CAPS contractor and let it cost what it costs — $150–$400 a bar. That is the most useful $400 you will spend this year. It is also worth a telephone call to your parent’s local Area Agency on Aging first, because some of them will install for qualifying seniors free or close to it.
What to buy for a parent’s bathroom: Moen Home Care bars in brushed nickel. They look like they belong in the room, the SecureMount system is forgiving of an older wall, and the 500-pound rating means you are not lying awake wondering about it. Start with the bar beside the toilet — not because it stops the worst falls, but because it is the one that gets used the most times in a day, and use is what turns a bar into a habit rather than an ornament. Do the shower next.
📅
Annual Maintenance — 10 Minutes Once a Year
A bar you put up correctly five years ago may not be correctly put up today. Walls move. Screws do not tighten themselves.
A bar you put up correctly is not a thing you did. It is a thing you did once and then stopped thinking about, which is the whole point of it and also the whole trouble with it.
Ten minutes, once a year. Pick a date you already remember for some other reason and do it then.
1
The Wiggle Test
Take hold of each bar and lean on it in every direction — down, toward you, sideways, and up. It ought to feel like part of the wall. No flex, no rock, no give at all. Any movement whatever means the installation has loosened and wants attention.
Screws back themselves out over the years. The framing moves with the seasons, the wall takes a knock now and then, and nothing in a bathroom has ever tightened itself.
Caught on a Tuesday morning it is two screws and a screwdriver. Caught the other way, it is caught by somebody falling.
2
Silicone Inspection
Look at the bead of silicone around every flange. You are hunting for cracks, for discoloration, and for any place it has pulled away from the wall.
A gap there is a door for water, and water behind a bathroom wall rots the framing the bar is bolted through. That is the failure nobody sees coming, for the plain reason that it happens in the one place nobody can look.
If the bead has gone: cut it all out with a utility knife, clean the surface with rubbing alcohol, let it dry completely, and lay in fresh mold-resistant silicone rated for wet areas. Give it a full 24 hours before anybody uses that shower.
3
Surface Condition Check
Press on the tile or the drywall around each flange and look for cracking, soft spots or staining. Drywall that gives under your thumb means water has already been getting in behind it. Cracked tile around a flange means the mounting has shifted and the anchor wants inspecting.
Neither of these is a large job when it is found early. Both of them are a large job when they are found late.
4
When to Reinstall Completely
Take it down and do it over if the wiggle test still shows movement after the screws are snug; if the wall around the anchor is soft or broken; if the bar has been pulled hard in a real fall; or if it has been more than five years and you were never quite certain the first installation was right.
Doing it over is the same two hours the first installation took. Not doing it over means owning something that looks like a grab bar.
🏠
If You Rent — The Law Is Mostly on Your Side
Under the Fair Housing Act a landlord generally may not refuse a disability-related modification made at the tenant’s own expense.
Most renters never ask about a grab bar, on the understanding that the wall belongs to somebody else and that settles it. It does not settle it. The federal rule on this is unusually clear — clear enough that when the regulation reaches for an example to explain itself, the example it reaches for is grab bars in a bathroom.
Under the Fair Housing Act, a landlord may not refuse to permit a reasonable modification of the premises, made at the tenant’s own expense, where that modification is needed by a person with a disability to make full use of the home. The protection attaches to the disability, and there has to be a connection between the disability and the thing being asked for. For grab bars and a balance or mobility problem, that is not a hard connection to draw.
It is a request, though, and not a notice. You are asking permission, in writing, and he may not unreasonably refuse. What he may do is attach reasonable conditions. He may ask for a description of what you intend to do. He may ask for reasonable assurance that the work will be done in a workmanlike manner and that any permit the job needs gets pulled. He may require you to agree to put the bathroom back as it was at the end of the tenancy, ordinary wear and tear excepted — which for grab bars means taking them down and patching the holes. He may not raise your security deposit for asking. In some circumstances he may ask you to pay into an interest-bearing escrow account toward that restoration, and the interest on it belongs to you.
Now here is the part worth knowing before you begin, because it changes what the job is worth doing.
If blocking has to go into the wall between the studs to carry the bars — and on a hollow wall it very often does — the landlord may require you to take the bars down at the end of the tenancy and patch the wall behind them. But he may not require you to take out the blocking. The reasoning printed in the regulation is about as plain as government writing gets: reinforced walls do not interfere with anybody, and some future tenant may need them.
It means the awkward, expensive part of the job — opening a wall and putting solid wood behind it — only ever has to be done once in that bathroom. By anybody. Ever.
In practice most landlords do not object once they have seen what a modern bar looks like on a wall. A toggle-bolt installation comes down and patches invisibly. A CAPS contractor can put bars up and take them off again without leaving a mark on the tile.
If a landlord refuses outright, your local Area Agency on Aging or a fair housing organization is the place to call, and HUD takes complaints on this directly.
This is a plain-language summary of a federal rule and it is not legal advice. State and local law may give you more than this does, and the details of an individual situation matter. If your landlord digs in, speak to a fair housing organization or a lawyer.
If you are in senior housing or assisted living: which rule applies depends on the building, so ask before you assume. The Fair Housing Act covers most housing, and under it the modification is normally at your expense. Where a property receives federal financial assistance, Section 504 of the Rehabilitation Act treats a needed structural change as a reasonable accommodation instead — and there the cost obligation shifts to the provider rather than to you. Ask your facility director in writing which category the building falls into and what their grab bar policy is. If they have not got one, that is worth knowing too.
📋
Free Printable Checklist
All four zones, specs, what never works, and annual maintenance in one printable page. Take it to your bathroom. Check off what you have. Buy what you don’t.
That is the math. Two bars at $45–$75 each, one WingIts anchor kit if needed, two hours on a Saturday morning with a drill and a level. When you are done you never have to think about it again.
The alternative is a $34,000 hip surgery, a rehabilitation facility, and someone else deciding what happens next. The grab bar does not guarantee you will never fall. It changes what happens when you do.
Grab bars only protect you when they’re mounted into studs and blocking. Get quotes from local pros — including CAPS-certified aging-in-place specializts — who do this every week.
Free · no obligation · licensed professionals in your area
What This One Buys You
Staying in your own house.
A fall is the single most common reason people leave the home they own; two hundred dollars of properly anchored steel installed at 55 is the cheapest insurance against that ever being your story.
General Information Disclaimer: Content on this site is provided for general educational and informational purposes only. This page does not constitute medical or professional safety advice. Grab bar installation requirements vary by wall type, construction, and individual physical needs. Consult a Certified Aging in Place Specializt (CAPS) or licensed contractor for professional assessment and installation. Product links are Amazon affiliate links — we earn a commission on qualifying purchases at no cost to you. Product recommendations reflect our honest assessment. In any emergency, follow guidance from FEMA Ready.gov. Some content on this Site is produced with the assistance of AI tools and is reviewed by a person before publication; see our Editorial Standards and Corrections policy. Codes and local laws vary enormously. Building codes, electrical and plumbing codes, permit requirements and local ordinances differ by state, county and town, and they change. Check with your own building department, and with your landlord, HOA or insurer where they apply, before installing, altering or removing anything described here.Nothing on this page is legal advice. None of it was written by an attorney, and it is not a substitute for speaking to one about your own situation.Do not undertake any physical effort described or implied here — lifting, pushing, pulling, carrying, climbing, kneeling, or assisting somebody else — without first discussing it with your own doctor, who alone knows your medications, your bone density, your cardiac fitness, the condition of your back and joints, your grip strength and your balance, and whether such activity is appropriate for you. A pushing or pulling task can pull a muscle or injure a joint just as a lifting task can, and nothing on this site should be read as encouragement to attempt physical work you have not cleared with your doctor first. This site does not recommend that any reader attempt to move, tip or shift any tall or top-heavy item, alone or with equipment — those tasks belong to able helpers or to professional movers. Full disclaimer →



 At 50 you can still get on a step stool. You can operate a drill. You can read a level and hit a stud and drive a screw. Your hands work the way you expect them to. Your judgment is intact and entirely yours.
 Standing up off a toilet seat is the most ordinary thing a person does in a day, and one of the commonest moments to go over. The knees and thighs that made it effortless at forty want a little help by seventy, and they want it two or three times a night in the dark. A bar on the side wall gives you something to push against going up and something to lower yourself with coming down.
 Consider what stepping into a shower actually asks of a person. One foot is down on a wet floor. The other is still out on the mat. For about half a second you are balanced on nothing whatever, in the wettest room in the house, generally before you are properly awake. A vertical bar at the opening gives that half second something to hold on to.
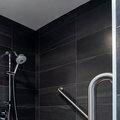 Once you are in there the business is not over. Washing is nothing but shifting weight, bending after a dropped bottle, reaching up, and turning round with your eyes shut against the soap. A long bar down the wall gives you one continuous handhold through the whole performance, so you never have to let go of it and go hunting for it again.
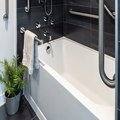 Getting in and out of a bathtub is the worst thing this room asks of anybody. You swing one leg over a wall fifteen inches high while standing on the other foot, on a floor that is very likely wet. Then you perform the whole thing backwards on the way out, with a wet foot on a slick tub and nothing at all to hold.